Digging into the Whys of Coating Failures
The most common reason coatings don’t do what they are tasked with doing is surface preparation.
#maintenance-repair
Failure analysis benefits from using a method called the “5 whys,” which is a process of digging deeper and deeper in looking at cause-and-effect relationships using the question “why.” (Five is generally considered the optimum number to get a solution, but the layers can be more or less).
This method is taught in quality training courses such as Six Sigma and Lean Manufacturing classes. But the concept behind it is so simple, it is understood by children. In fact, our children use it often on us by continuing to ask why until they get an answer that satisfies them.
Applying this method to the topic of coating failures goes like this: The first time we ask why a coating failure occurred, the technical root cause is revealed, and it is time to ask why again. The second layer of why is often found to be: not following the instructions for the surface preparation and application of the coating. The topic of this article is the third why.
THE WHYS
During most coating applications, the content of three sets of documents must be followed to obtain a coating that will have the design life desired by the owner. First is the coating specification, which is written by the owner and details specific procedures and quality control activities that must take place for the coating to perform as desired. Second are the standards referenced in the coating specification. Standards are procedures or tests written by a consensus of industry experts, such as ASTM International, International Organization for Standardization (ISO), and NACE International. Third is the technical data sheet (TDS) for the coating in question. Written by the coating manufacturer, this document also contains instructions and limitations for the surface preparation and application of the coating.
The third why gets to the point of this article: Why were the instructions on how to apply the coating not followed? Some party involved in the application of the coating deviated from the instructions. In many instances, deviating from the specification, standards and TDS becomes commonplace.
In her book, The Challenger Launch Decision: Risky Technology, Culture, and Deviance at NASA, Dianne Vaughan coined the term “Social Normalization of Deviance.” She was discussing the space shuttle Challenger explosion. Vaughan’s definition is: “Social normalization of deviance means that people within the organization become so much accustomed to a deviation that they don’t consider it as deviant, despite the fact that they far exceed their own rules for elementary safety.”
While Dianne Vaughan’s book is about safety and the Challenger disaster, the same concept can be applied to quality. What follows are several case studies where social normalization of deviance played a part in coating failures.
CASE ONE: Pressure Vessel Interior Coating
A pressure vessel used as a phase separator was found to have an interior coating failure when coating chips were found downstream in a strainer. The vessel was emptied, cleaned and entered by a subject matter expert (SME) tasked with performing a failure analysis. What was found was intercoat delamination between two layers of the coating system.
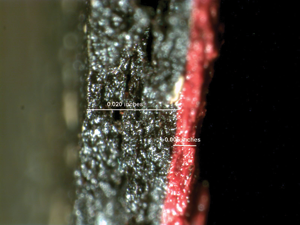
The system was one coat of epoxy primer specified to be 2−3 mils, one coat of coal tar epoxy at 6−8 mils and one coat of coal tar epoxy at 6−8 mils. The intercoat delamination appeared to be between two coats of the epoxy primer.
The cause of the failure was: The coating was too thick, trapping solvent in between layers of the system, which led to blisters and intercoat delamination. The owner had created a specification, and the manufacturer of the coating had a TDS that detailed the required thickness of each coat. The applicator was ISO 9001 certified and had processes in place for following the owner’s specification. The applicator deviated from the specification and the written instructions from the coating manufacturer’s TDS without understanding that it would cause a failure. This deviation resulted in a requirement that the entire interior of the vessel be reblasted and recoated.
CASE TWO: Pipeline Station Construction
The piping in a pipeline station had a specified exterior coating system that consisted of one primer coat of inorganic zinc at 3−4 mils and one topcoat of polysiloxane at 5−6 mils. The piping was coated at the fabrication shop before it was shipped to site, where the flanges were bolted together during construction. When the system was pressure tested, the topcoat cracked and delaminated from the primer.
The failure analysis showed that the dolly pull-off adhesion was 200 psi, when it should have been about 1,000 psi or more.
Review of quality control records from the coating application and interviews with the applicator and the inspector onsite during coating revealed that the topcoat often was applied during the same shift as the primer. But the inorganic zinc primer required a 24-hour cure before a topcoat could be applied. The failure occurred because the recoat window required by the manufacturer on their TDS was not followed. Deviation from the required recoat window had become commonplace because of pressures of scheduling for shipping the components to site for assembly. Additionally, the project had deviated from good manufacturing practices, using the same third-party inspector as both the quality control inspector and the project management/expediting representative in the fabrication/coating shop.
This coating failure resulted not only in requiring the entire station be reblasted and recoated, but also led to a scare about the metallurgy of the piping and concerns about each heat used in manufacturing the piping, fittings and valves. The coating cracking was initially thought to be caused by the piping swelling during the pressure test. Enormous effort was spent testing the metal and reviewing the documentation of pedigree for each heat of steel before the issue was found as only a coating issue.
CASE THREE: Improper Repair
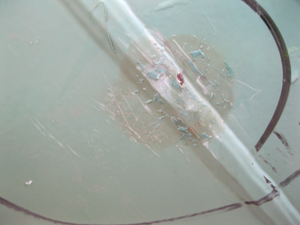
The pipe was originally coated with fusion-bonded epoxy (FBE), a powder coating applied in a mill. When small pinholes are found in the FBE, they are repaired with a patch stick at the mill. A patch stick is a thermoplastic polymer that can be melted and then solidifies as it cools, providing a coating over the hole. A discovery was made in the field that most of the repairs had poor adhesion—some of them could be removed with a fingernail.
An investigation found two problems with the coating, both directly related to application. The TDS from the manufacturer stated that the entire surface was to be coated with a patch stick that needed to be abraded, and that during the application, the pipe was to be heated with a propane torch, then the heat of the pipe used to melt the stick. In practice, the entire area to receive patch stick coating was not abraded and the patch stick itself was heated during application, not allowing enough heat for the patch stick to flow down into the abraded area, which would have ensured adhesion (Figure 2).
In the FBE mill, small deviations in surface preparation and application methods had occurred over time until the deviations reached a point where they caused a failure. The result of this failure was that thousands of patch stick repairs had to be removed in the field on the pipeline right of way and replaced.
CASE FOUR: Above-Grade Valve Coating
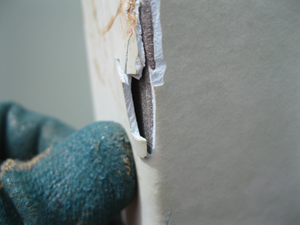
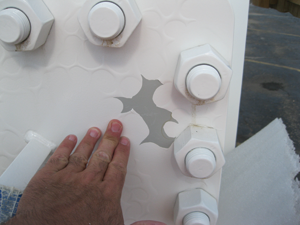
The valves were coated with an epoxy primer specified at 4–6 mils thick with a urethane topcoat specified at 2–3 mils thick. The blisters were filled with a mixture of water and solvent. Around the blisters, the topcoat could be easily delaminated from the primer by hand (Figure 3).
The failure analysis found that the recoat window recommended by the manufacturer’s TDS was not followed. The topcoat was applied too soon, before the primer had properly cured, leaving solvent to be entrapped in the primer. This eventually drew in water through osmotic pressure and caused the blisters and intercoat delamination. The valve manufacturer had deviated from the requirements set forth by the coating manufacturer, not realizing that the result would be a coating failure. As a result of the coating failure, multiple valves had to be to be reblasted and recoated in the field.
CASE FIVE: Below-Grade Valve Coating Failure
Subsequent investigation showed there were two main failure modes. One was that the fins on the valves did not have an adequate anchor profile. Abrasive blasting with the typical coal slag used by the valve manufacturer did not impart the depth of anchor profile required by the coating manufacturer; the coal slag was too soft to adequately abrade the work-hardened steel.
The second was that the valves were not adequately blown down between abrasive blasting and coating to remove the dust from surface preparation. This dust was visible on the back side of the disbonded coating chips. While not using a harder abrasive such as aluminum oxide to deal with the work-hardened steel was not a deviation from written requirements, the lack of adequate dust removal from the valve before coating application was a deviation, one not recognized by the valve manufacturer as a quality risk. The result of the coating failure was that nine large valves had to be recoated in the field.
SOCIAL DEVIANCE
In each of these cases, only three of five whys revealed that social normalization of deviance contributed to the coating failures. In each case, the coating applicators had deviated from a written requirement; either from the customer or the manufacturer of the coating they were using.
These deviations were committed by very successful companies, some of whom had rigorous quality management systems in place.
So how could all this happen? We still have the fourth and fifth why to determine the answer to that. But that is a subject for another article.
NEIL PITTMAN is the senior coating specialist at Lake Superior Consulting, a full service engineering and consulting company. Pittman specializes in solving coating problems and answering questions. Reach him at at npittman@lsconsulting.com.
RELATED CONTENT
-
Grease for Motor Actuator Maintenance
Maintaining the right amount of grease inside motor actuators that use grease for lubrication is a vital part of valve maintenance, and can save time and money by preventing problems before they happen.
-
The Limits of Standard Manual Globe Valves for Throttling
A common practice in process services is to use manual globe valves with hand wheels for regulating flow.
-
Lubricants: Always Important—Sometimes Essential
Most valve professionals take more notice of the oil or fluid flowing through the valve than the oil that lubricates the valve’s mechanical parts.





 Unloading large gate valve.jpg;maxWidth=214)

